Pitching Grips and Mechanics for Beginners
Major League pitchers make it look easy to dot the corners of the strike zone with high-90s fastballs and throw hitters off-balance with knee-buckling breaking balls. But success on the pitching mound requires a rare combination of skill, strength, and mobility. The pitchers you see on TV have all benefited from many years of coaching and massive advancements in the study of pitching development over the past two decades.
There’s so much research and information around pitching mechanics and pitch grips that it would be impossible to cover it all in one place. Whether you’re just starting out or looking to throw better pitches with more accuracy, understanding the basics of pitching can help you identify areas where you can improve.
Key Takeaways
Beginners should focus on consistent pitching mechanics and fastball control before learning additional pitches.
Start with a four-seam fastball grip, then gradually introduce pitches like changeups and curveballs with guidance from a qualified coach.
Good pitching mechanics generate power from the legs and hips, helping pitchers improve velocity and accuracy without relying solely on arm strength.
Practice throwing to a target and track your strike percentage, aiming for consistent control before adding new pitches.
Protect your throwing arm by managing workload, avoiding pitches that cause discomfort, and never pushing through pain or fatigue.
Different Pitch Grips for Throwing Different Pitches
The following table summarizes the pitch grips described below. Grip and pitch selection should be tailored to each athlete with a qualified coach.
Pitch | Grip or technique | Beginner focus |
Four-seam fastball | Index and middle fingers across the seams; thumb underneath | Build a consistent grip and throw strikes |
Two-seam fastball | Two-seam orientation; exact finger placement varies | Learn control before emphasizing movement |
Curveball | Grip and release vary by pitcher | Introduce only with qualified coaching |
Circle changeup | Thumb and index finger form a circle; other fingers over the ball | Maintain consistent arm action |
Cutter | Fastball grip shifted slightly to one side | Advanced variation; learn with a qualified coach |
Splitter | Index and middle fingers spread in a V on opposite sides | Advanced pitch; not a starting point for young pitchers |
Knuckleball | Fingernails press into the ball to limit spin | Specialist pitch; learn with a qualified coach |
A pitcher’s arsenal is another very individualized aspect of pitching. Every pitcher will find that some pitch types come a little bit easier than others. As pitchers experiment with and hone their pitches, they find the pitching grips that work best for them. If you asked 10 Major League pitchers how they hold their sliders, you may see 10 different grips.
It’s natural to tinker with how you position the seams of the ball and how you apply pressure with your fingers to see which approaches give you the most movement and the best control. As you practice pitching grips, pay attention to finger placement, finger pressure, and how the ball leaves your hand. If you rip off the best curveball of your life, but you weren’t focused on how you threw it, you won’t be able to repeat it.
Master one pitch before you move on to the next one. We see lots of young pitchers claiming they can throw seven or eight different pitches, because they’re trying to emulate some (rare) Major Leaguers who do. But it’s more effective to have mastery over two pitches than to throw six different pitches with no control.
As a general rule, you want to be able to throw a pitch for strikes 50-60 percent of the time. Only move on to learning the next pitch once you can control your other pitches consistently.
Fastballs
Almost every pitcher starts out throwing fastballs, as they should. The fastball is the easiest pitch to control, and most pitchers rely on their fastball to get ahead in counts and set up their secondary pitches.
The most common type of fastball is the four-seam fastball. The “four seams” refers to the four seams that rotate into view with each full spin of the ball. The typical four-seam grip is to hold the ball with your index and middle fingers so that the tips of the fingers are just above one seam of the baseball while the other seam sits near the base of the fingers. The thumb should be on the bottom of the ball, with the other fingers off the side.
A two-seam fastball can be harder to control at first but often generates sinking action on the pitch.
After the fastball, the most common secondary pitches that pitchers learn are curveballs and changeups. In both cases, the grips may vary by what works best for an individual pitcher.
Curveballs
To throw a curveball, pitchers flip the ball over their fingers at release to generate topspin and throw a pitch that dives downward as it approaches the strike zone. It may be tempting to slow your arm down while you throw it, but the ball will naturally move more slowly than your fastball due to the way you release it, and maintaining consistent arm action will both help you command the pitch and make it a more effective means of deceiving the batter.
Changeups
The most common changeup grip is a circle-change, in which the pitcher makes a circle with the thumb and index finger of the throwing hand and extends the other three fingers over the ball. Allow the fingers to slow down the ball, not your arm's action. Long toss is a great way to work on a changeup, as it promotes maintaining good arm speed while learning to throw it.
The Fundamentals of Good Pitching Mechanics
One of the beautiful things about pitching is that every delivery is a little bit different. A pitcher’s delivery is like their fingerprint, and it’s OK to maintain some individuality in your throwing motion. The timing and rhythm of your delivery are important for staying comfortable and consistent, and what works for you, works for you.
Still, the most efficient, effective, and repeatable deliveries typically share a lot in common. Pitchers generate power from the ground up, using rotational energy in the hips and torso to propel the throwing arm forward.
Body Position and Delivery Sequence
Some aspects of a good delivery come instinctively to some players; others may need to be developed or corrected. In some cases, an issue in a pitcher’s throwing motion may simply require an adjustment to their mechanics, in others, it could be related to a lack of mobility in a joint.
For more opportunities to develop fundamentals with coaching support, explore IMG Academy sport camps.
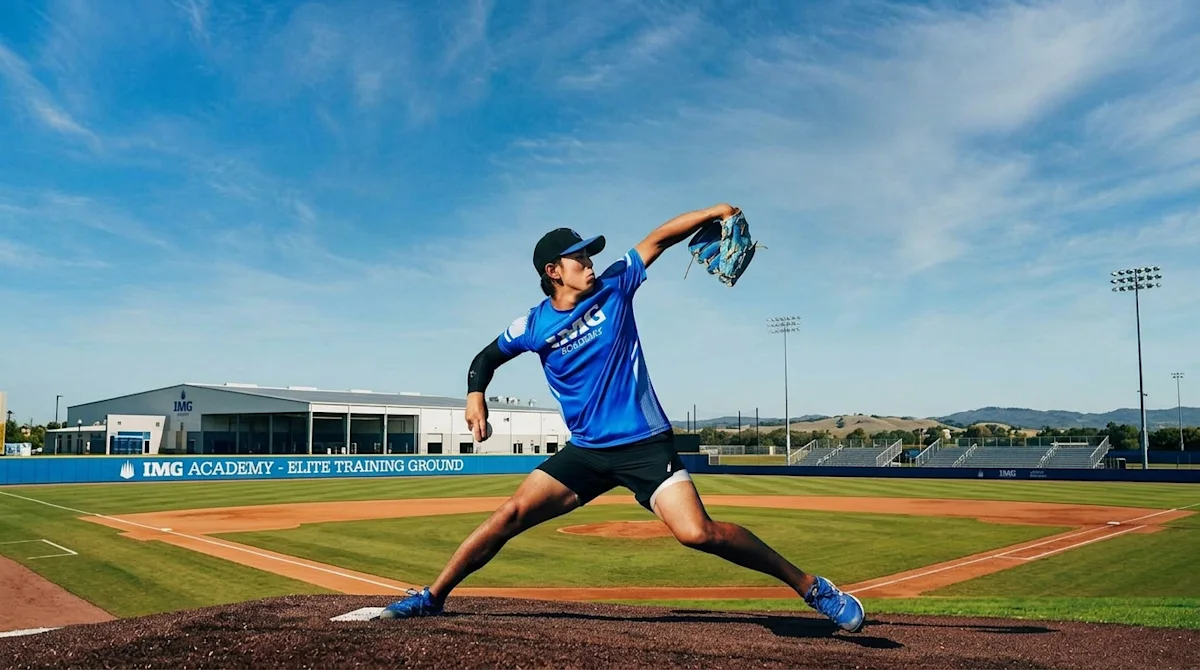
At levels without restrictions on base-stealing, pitchers typically use a full windup with the bases empty and the stretch position with runners on base. These rules usually apply around age 12 and up but vary by league. In both deliveries, the crucial kinetic sequence begins with the back foot perpendicular to the target, and the pitcher lifts their front leg.
Here are some of the keys coaches look for in pitching mechanics:
Back foot anchored:
In the past, many coaches emphasized the importance of pushing off the back foot, but it’s more effective to focus on keeping your weight over your back leg at the start of your delivery with your back foot anchored to the ground, allowing it to naturally corkscrew as your weight comes forward.
Lead knee:
There’s some variance in how pitchers lift their front leg, but we often find it helpful to emphasize getting the lead knee in line with the back shoulder, which helps pitchers keep from “flying open” in their delivery, turning their upper body toward home plate before the hips.
Upper half:
Again, with an eye on avoiding moving the upper body too soon, pitchers often generate the most explosiveness when they slightly counter-rotate their upper half while the front leg is up.
Stride length:
The optimal length of a pitcher’s stride, the distance from the rubber to where the lead or “strike” foot lands, can vary, though generally it’s around the same as the pitcher’s height, or slightly shorter. You may hear about big-league pitchers with incredible extension that shortens the distance of the pitch, but consciously chasing extension often compromises mechanics, sapping velocity and accuracy.
Hip-shoulder separation:
When the front foot strikes the ground, your hips should be exploding open to the plate, but your shoulders should still be square to the base you’re facing (third base for a right-hander, first for a lefty). Opening the hips will begin the internal rotation that slingshots your upper body and throwing arm forward toward the plate.
Arm position at foot strike:
By the time your front foot lands, your throwing elbow should be level with your shoulder. Dropping the elbow puts too much torque on your arm and can lead to shoulder injuries. The thumb of your glove's hand should still be facing downward at foot strike and will rotate upward as the glove moves toward your hip while you deliver the ball.
Developing Velocity and Control as a Pitcher
It seems intuitive that a pitcher looking to increase their accuracy should throw a little softer, but consciously slowing down your delivery and trying to guide the ball to the target will often have the opposite effect on control. Good control and good velocity both come from good mechanics, and consistency in your delivery will allow you to develop more command of your pitches with repetition.
Always throw to a target. When you’re playing catch, your target is your partner’s glove. But even if you’re just throwing a ball against the wall, make an X in tape on the wall and throw at the X. The feedback you get from hitting and missing your target will give you a feel for what your body needs to do to control your pitches.
How to Build Pitching Strength
There are an enormous number of factors that contribute to a pitcher’s velocity. Some of it comes from natural physical strength, quick-twitch explosiveness, and timing. Some of it comes from mechanics, and a pitcher’s ability to generate force from the ground up. Pitchers at high levels with consistent and efficient mechanics may gain a few ticks by adding core strength or leg strength with exercises like squats, lunges, bounds, and medicine-ball throws.
For more training ideas, explore IMG Academy’s baseball strength and conditioning resources.
At IMG Academy, we often use plyo balls when training pitchers. Plyo balls may be heavier or lighter than a regulation baseball. Throwing overweight balls often helps pitchers add strength and maintain more consistent arm positions in their deliveries, while underweight balls can help pitchers develop faster arm speed. But we prescribe different plyo-ball routines to different pitchers, and throwing weighted balls alone doesn’t necessarily correlate to throwing harder.
The most universally agreed-upon method for developing more velocity is long toss, a throwing drill in which partners gradually increase the distance between them. Trying to throw the ball far often feels more instinctive than using a pitching delivery. It can sharpen your understanding of how you generate power and how the ball comes off your fingers. Just always be intentional about it, pay attention to what you’re doing so you can recognize what works.
Keep Building Your Pitching Skills
Build on consistent mechanics and fastball control, then add pitches one at a time.
Keep practicing with IMG Academy’s baseball drills and get nutrition and mental performance support through IMG Academy+ Personal Coach.
For additional skill-building resources, explore the IMG Academy+ Essentials library.
Frequently Asked Questions
What's the right age to start learning pitches beyond a fastball?
This is a controversial topic. Some coaches caution that trying to learn a breaking pitch too early can lead to injuries. Others believe a youth pitcher can develop a curveball under a coach’s supervision, provided their mechanics remain sound. Still, the most important thing for any youth pitcher is to develop control of their fastball and learn how to attack the strike zone. This is something all coaches agree on. Usually, pitchers start working on their secondary arsenal as teenagers, when their competition is good enough to hit their fastballs.
How do I learn a new grip without messing up my mechanics?
The mechanics should come first. Ultimately, you want to throw pitches hard. The change in speeds on your pitches will come from your fingers and your release. If you need to slow down your entire delivery to throw a breaking ball, not only are you more susceptible to injury and inconsistency, but good hitters will pick up on it quickly and make you pay for it.
Long toss, again, is a useful exercise for developing new pitches. You should limit the distance on pitches like curveballs and sliders that involve supination, but long-tossing with secondary pitches helps emphasize the need to keep your delivery moving at full speed even when the pitch type doesn’t. For changeups, long-toss allows pitchers to get a feel for slowing the ball with their grip while keeping the same arm action. It’s very difficult to develop a changeup from the mound, as it’s natural to slow the arm down when you’re trying to throw a slower pitch.
Which pitches are safe for a young arm to throw?
Injuries are an unfortunate reality in pitching, and if there was one proven method for keeping pitchers healthy, everyone would know it already. Young pitchers are often more pliable and recover faster than older ones, and it’s easier to develop better natural movement patterns at a young age. What’s safest for any arm is listening to the body and knowing not to push through any aching or fatigue.
Speaking generally, a fastball is the safest pitch for a young arm because it helps craft the consistent mechanics pitchers will need to throw effectively at any level. Many coaches think there are healthy ways for youth pitchers to throw curveballs and changeups as well. Younger pitchers should probably stay away from sliders and split-finger pitches due to the strain they put on the arm.
How do I know if my mechanics are hurting my arm long term?
This is another million-dollar question in the baseball industry. There are certain common flaws that leave pitchers susceptible to injury, especially dropping the elbow below the shoulder at foot-strike or delivering the ball with a straight-over-the-top arm angle that forces the head to jerk out of the way. But pitchers with seemingly flawless mechanics still sometimes get hurt. Maintaining a smooth, efficient kinetic chain and keeping your body strong, flexible, and mobile will do the most to keep you healthy.
How do I add movement without losing control?
It’s always going to be a little more difficult to command a pitch that’s moving than one that’s going straight. That’s why we look for a higher percentage of strikes on four-seamers than strikes on curveballs or sliders. And there’s a balance to find between getting the most possible movement on a pitch and having command of it, a slider that breaks too hard and sails away from the plate every time you throw it won’t do you much good.
The way to develop control of breaking pitches is through repetition and intentional practice. The keys are repeatability and consistency. While you’re working on your pitches, pay attention to what you’re doing on each pitch so when you find a grip and release that feels good and looks good, you can do it again.
How long does it take to master a new pitch?
How long it takes to master a new pitch varies with each pitcher and each pitch type. And even at the highest levels, a pitcher may find that they don’t have a good feel for one of their pitches in any given outing. Chart your bullpen sessions and pay attention to how many strikes you’re throwing with your new pitch. When you feel like you can get it over the plate at least half the time, try it out in live batting practice sessions to see how it feels and how it plays against a batter. You need to have full confidence in a pitch before you can use it in a game.